Life Drawing 5: Don’t try this at home

Well, life drawing was cancelled again this week. But, I wasn’t about to let that stop me!

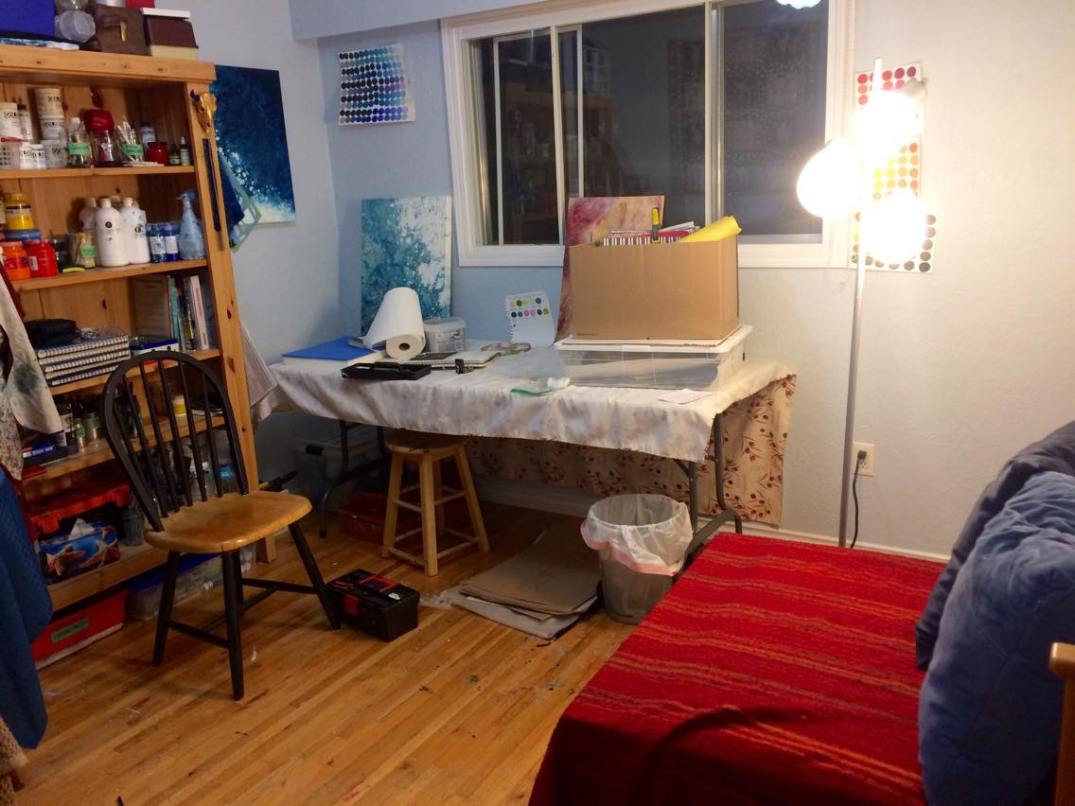
Being the resourceful woman I am, I set up my own home life drawing studio complete with heating lamp and pedestal and coaxed an unnamed person to pose for me. (I won’t be uploading any of my drawings for obvious reasons). Well, doing life drawing in your  home is not at all awkward, especially when your roommates are your parents. (Rent in this town is unbelievable, people. Don’t judge me.). Anyhow, I was obviously in for quite a different experience than a drop-in session.

28879336_10156244078039591_11734171_o

First, we shortened the poses because, in case you didn’t know, it’s extremely difficult to sit in one position without moving for any length of time, let alone 15 minutes. So, we did 5 x 1 min, 3 x 5 min, 3 x 10 min, and 2 x 15 min. I was also in charge of the stopwatch, something I never had to think about in drop-in sessions. Luckily, I use an interval timer on my phone when I’m at the gym. So, I made a new workout with 15 second breaks between each pose and longer ones between sets.

The whole drawing-someone-you-know thing didn’t concern me because the whole time I was much more concerned with how frustrated I was at my drawings. They were just terrible! I’ve become accustomed to the luxury of sitting on a donkey, and my studio stool did not suffice. This was reflected in my wonky drawings. Not to mention, I couldn’t get my proportions right no matter what I tried. It didn’t occur to me until a day later that this was likely because the distance between my model and myself was so small – about 4.5′. Well, no wonder. I had no perspective at all. I couldn’t even see his entire body in one glance: I had to look up and down to get his whole figure!

So that’s problem number 1. Problem number 2 I just realized now as I sit here typing. The life drawing studio at UVic is very sparse: only white walls, a concrete floor, a circle of donkeys, and a sink. The light diffuses from above only through the room’s skylight, fluorescent lights, and single heating lamp. So, it’s much easier to see value and form because of the ‘single’ light source and sparse surroundings. The room focuses your attention on the model. If I were teaching students how to draw form, I wouldn’t start with a still life crowded with fruit, drapery, candles and lamps in all different places, and a patterned back-drop. No, I would start with basic forms – a sphere, a cube, a pyramid – a neutral background, and one light source. Hey, there’s an idea for practice…

Tips for scaffolding form for still lifes and life drawing:
1. Set-up a 5 sided shadow box with a single light source (above). Can use a shoe box without the lid
or any other cardboard box.

2. Place single forms in the box. Start with a sphere, then a triangle, then a cube by themselves. 

3. Have students practice drawing these single forms with a single medium. Gradually add other media 
options (ink, charcoal, graphite). Stay in black and white mediums. After practicing with 
an above light source, encourage students to move the light around to practice different angles of 
light and shadows. 

4. Gradually encourage students to add in more forms, one by one. Encourage students to move forms 
to varying planes, overlapping each other, stacking, all for visual interest. If students are working 
in groups, allow them to move the forms until all group members agree on the composition, but (they 
must practice their rhetorical and logic skills in addition to their visual skills) if they want to 
move something, they have to give a reason. Keep practicing the drawings.

5. Set-up a relatively simple still life. Encourage students to negotiate the composition using he 
method above. Use thumbnail sketches to help determine final composition. Practice this still life 
with many warm-up sketches. 
OR: Set-up a life drawing session and follow a short to long pose progression with multiple poses 
of the same length.
8_Still Life Tempera
Disrupted Close Reading, 2018, India ink and egg tempera on watercolour paper
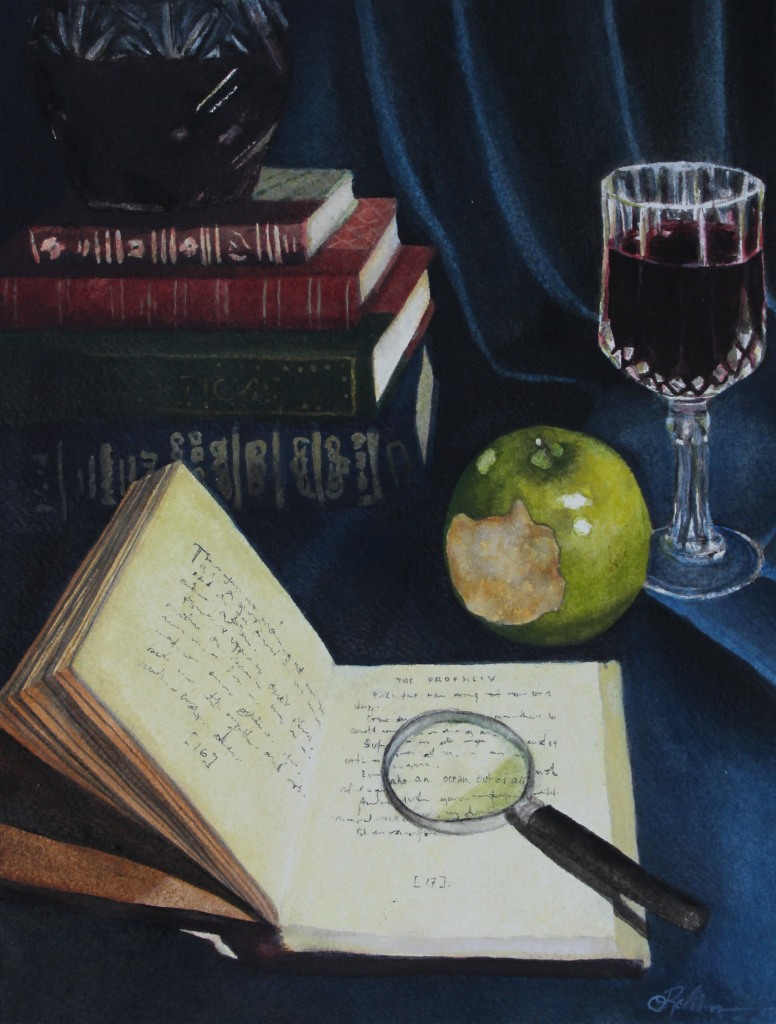
For a summative Grisaille Egg Tempera Still Life Project:
1. Having practiced the simple still life, have students set-up their own still lifes with found objects. 

2. For their final project, have students translate their still life to watercolour paper with India ink. 
(If unable to leave still lifes set-up until next class, demo how to photograph a still life and edit into a black 
and white digital file with Photoshop to achieve correct values and contrast. Print photos and store for next class. 
Have students transfer their photo still life onto watercolour paper first using pencil and the 3 x 3 grid method. 
Next, move to India Ink). 

3. Demonstrate how to mix egg tempera and watercolour paint. Demonstrate how to apply egg 
tempera to add colour to the India ink painting. 

4. Have students complete their paintings using egg tempera.

Anyhow, I think I’ve discovered why I love the room at UVic so much. It’s simple. And, I suppose I’ve learned my lesson: I don’t think I’ll be attempting any more life drawing at home for a while. If I ever do again, I better make sure I have a bigger room, do it with one light, and simplify the setting!

Tech Tools and Oak Bay High School with Trevor MacKenzie

Today my EDCI 336 class met for a tour and class at Oak Bay High School with English teacher Trevor MacKenzie.

Oak Bay is unlike any school I’ve ever been in. Every classroom has its own garage door that opens to common areas within each ‘wing.’ Teachers and students are encouraged to roam the halls during class to make use of the space. Most classrooms even have moveable adjoining walls that allow for co-teaching.

A garage door? This ain’t shop class! 

First thing I noticed, aside from the design of Oak Bay, were the butterflies and heart palpitations in my chest upon re-entering a high school. Is this how I, a future high school teacher, am really feeling? I’m supposed to be in charge some day. Me. Ahh! School had already let out and at least 3/4 of the students had left for the day, but I still felt daunted by the amount of teenagers…all in one place.

Thankfully, this didn’t go unacknowledged. This was my first hint that Trevor wasn’t some ordinary teacher. He was truly perceptive. His first question: “how many of your felt a little sick walking in here today?” Three of us in my cohort raised our hands sheepishly. Trevor said he felt the same way when he first started his practicum. Well, thank goodness we’re not alone.

After our brief tour, Trevor brought us to his classroom. I was surprised by the size. I don’t know if my perspective has changed now that I’m an adult (cough*chuckling at the fact that I fall into that category*), but classrooms seemed bigger when I was in high school. Maybe schools are being designed to align with the 2016 Supreme Court of Canada ruling that included restoring class size and composition ruling. Trevor spoke to the design of desks in his classroom, which made a lot of sense to me. He’s a proponent of groups of 3; there’s no room to hide in a group of 3 (in other words, students will always be ‘forced’ to talk). In groups of four or more, the discussions can often be inequitable. Coming from an art and literary background, I know there’s something about the rule of three that just works in so many aspects of life.

We then got down to some of Trevor’s favourite edtech tools.

I love the placement of the podium and the screen – both front and centre. A visual metaphor for the equal importance of digital and live oral presentation skills and in-the-moment teaching.

Flipgrid

Never thought I’d come around to a tech tool so quickly or so much, but I love Flipgrid! Flipgrid is a super easy online video posting and viewing site for student engagement and formative assessment. It is a transformative way for students to interact with course objectives beyond speaking aloud or writing their answers: they must consider their video quality and form in addition to their oral presentation skills. In other words, students will work on their digital fluency/literacy by producing digital content. Trevor makes sure that after he assigns a Flipgrid task, the class comes together to watch each other’s videos. This is an opportunity for Trevor to provide in-the-moment feedback where he incorporates digital literacy teachings and pointers such as, “you came across really personably, but the camera shaking was distracting.” If Trevor doesn’t use a Flipgrid activity in-class but assigns it for homework, he notices that students will watch and comment on each others videos, and students will upload a more polished video based purely on peer feedback. What a way to harness the power of social learning and motivation!

Here’s some things I love about Flipgrid:

  • Flipgrid allows for immediate, in-the-moment coaching. I can absolutely see its use for formative assessment and its potential, when used correctly, for summative assessment. 
  • It’s an easy integration of digital literacy competencies and conversations in the classroom.
  •  It’s simple design! Flipgrid allows for videos ranging from only 30 seconds to 5 minutes, and the teacher has control over the maximum video length for each task. Brilliant! Also, there’s no editing function for videos: it’s a one shot deal where the focus is more on what you say rather than the video’s form (though that’s important too).
  • Videos aren’t uploaded immediately after being taken. Students have the ability to watch and re-record videos. But once they click upload, the video instantly appears for the class or teacher to view.
  • Flipgird bypasses all the nonsense of platforms like Youtube. As an instructor, you can make your class completely private, invisible to outside users.
  • Trevor uses Flipgrid to scaffold into oral and live presentation skills. As students record and watch their videos in class while receiving live, in-the-moment feedback from peers and their teacher, they become aware of which skills to work on and become more comfortable with speaking in front of their peers without being penalized/before the summative assignment of a live presentation.

Task and activity ideas utilizing Flipgrid in my classes (English and Art):

  • Wheel throwing (a.k.a. the hardest thing ever). Have a student record my demo and post it to our Flipgrid page. Students can re-watch for form tips. They could also record themselves throwing for comparisson and notice any potential problems.
  • Painting/drawing/technique demos. Students record mine and their own. As an activity, have students teach a technique. Follow-up by having students watch 5 techniques, and record themselves trying one.
  • Slam poetry
  • Concise debate points
  • Rants (a-la Rick Mercer)
  • Storytelling
  • etc. etc. etc.
Trevor’s class’s guerrilla poetry project. The class looked at Shane Koyczan’s poetry for hope and perseverance. They then found textual evidence of these themes and wrote them on stickies. They placed this banner in the halls and watched as the stickies grew simply by students walking by and engaging out of curiosity.

Kahoots

This one’s not new to me, so I won’t go into as much detail. I’ll just say that I love the way Trevor uses it in his English class. We all know how tiring and time-consuming it can be to teach discipline vocabulary. And literary devices certainly aren’t the most exhilarating. But, Trevor’s found a clever way to use Kahoots to engage students in this essential and required learning. The BC Grade 12 English Provincial Exam, for example, requires students understand aprx. 200 literary terms and devices. Trevor scaffolds these throughout the year by distributing 25 terms/week. Students must then create a study guide of their choice (flashcards, online flashcards, rote memorization from writing definitions, etc.) to study only the terms they don’t already fully understand, thereby limiting their load. Trevor checks their study guides for completion marks throughout the term. Then, once a week he does a Kahoot quiz. As the quiz results appear immediately, Trevor is able of  to bypass terms students already understand to focus on providing direct instruction for the more confounding terms. Most importantly, the quiz is not a summative assessment. He uses it formatively for both his teaching and as a means of providing immediate student feedback. Best of all, students can re-take the quiz as many times as they want to practice the terms throughout the semester!

Explain Everything

Talk about a multimodal tool. As Trevor describes it, this is a digital whiteboard on steroids. Essentially, this is a presentation tool in which students can create videos using text, images, videos, and their own overlaid voice recording. It allows for more editing compared to Flipgrid, can accommodate longer recordings, and it’s use of multiple modes makes it a great tool for summative assessment assignments. Plus, it’s far more engaging than a PowerPoint or slideshow. However, it’s of course a recording, so students are not using live presentation skills. But, this makes it a great tool for further scaffolding into live presentations. Students will script or prepare what they’ll say, but will have the opportunities for revision and re-recording.

MORE tips and nuggets of wisdom from Trevor:

  • When asking students to ‘share out’ to the class after a group discussion, give them 60 seconds to re-cap what they’ve just talked about. This allows those who don’t feel comfortable speaking to the class to at least hear the mental processes that are used when surmising salient points, if not provide input to the speaker. Simple and brilliant.
  • Let go of the content, grab onto the personal. Get to know your kids, and design meaningful ways for them (or have them design ways) to harness what they know and are passionate about. This is where inquiry comes in to play. One of the best parts of open inquiry, students will self-accommodate/differentiate.
  • Consider Universal Design for Learning (UDL) and equity in your planning. Trevor uses the example of Google Classroom. He doesn’t assign work on Google Classroom (God bless. Neither will I.), but uses it as an accessible folder for students to download rubrics, assignment details, project descriptions, as well as access links, resources, etc. that he’s mentioned in-class. *cough* THIS IS HOW IT SHOULD BE USED! *cough*
  • Be flexible and aware of the ebb and flow of a lesson. Be present and in the moment. Stay attentive and perceptive to your students’ needs. Do I really need to elaborate?
  • Finally, don’t use tech just because it’s there. Tech must be transformative! If it’s not adding richness to an otherwise ‘simple’ or ‘analogue’ task, why use it?
Below the window in this very terrible photo you can see what Trevor described as a student’s inquiry project artifact (i.e. the evidence a student leaves of their term-long self-directed investigation into an area of passion). This student wanted to become a professional photographer. These are some of his before and after shots.

Okay, I think I know what Valerie was talking about when she said this was going to be an inspirational afternoon. Today’s session has made edtech, which has always seemed so abstract in my mind, so much more concrete. It was so affirming to see a teacher so committed to his students and so mindful of his pedagogy. I’m so grateful.

iMovie Video Editing Workshop

Today I took part in an Introduction to Video Editing with iMovie Workshop hosted by DSC Manager Rich McCue at the Digital Scholarship Commons in the McPherson Library. What a fantastic space! The Digital Scholarship Commons offers workshops on a variety of tech topics such as Photoshop, Arduino, Audio Editing, Data Analysis, Twine, etc.  (Sidenote: I asked Rich if he ever has teachers or students from the local public school system attend workshops, and he does!) They have on-site experts ready to answer your questions about 3D printing, computer electronics, RStudio and data analysis, textual analysis, and visual design. They also assist professors and students in using digital tools in teaching and research. Finally, they have more hardware than I could wrap my head around, all available for student on-site use and borrowing.

I was particularly impressed with Rich’s pedagogy. He was very prepared and clearly had experience working with true beginners. We were asked to prepare for our workshop by looking over the following beforehand:

For the workshop, Rich had prepared 3 projects for us to choose from each with their own step-by-step printed instructions (which I have saved and plan to use in my own classroom!). Being a beginner to video editing, I chose the first project, “The Basics, In-Class Activity #1” and “Slow-Mo & Audio Editing.” Both gave me the practice necessary to complete a small video project I have in mind to complement my personal learning plan passion project (more on that later!). So are you ready to see my feature films? They’re pretty extraordinary:


Note: Youtube videos cannot be set to private if embedding on WordPress for others to see

Also notable, I asked Rich what was a Windows or non-Mac iMovie comparable software  that I could suggest to my future students for video projects. Since students will be recording videos on their phones or tablets, he suggested they use the Adobe Clip app for Androids and, of course, the iMovie app for iPhones. Both are free and easy enough to use for class projects. They can also be used on computers if students don’t have access to phones.

Rich also suggested another software, Video Ant, which was created by the University of Manitoba and is free to use. This is a tool for collaborative video annotating. He uses it to annotate game and practice videos for the sports teams he coaches. He asks players to review their performance and annotate one positive move and one move they need to improve. It’s efficient for teachers, players and students as annotations make for much quicker video reviewing. Video Ant is linked with Youtube, where you will upload your video and set it to either public or private.